For any non technical users migrating a website from one server to another server is a nightmare and even after a successful migration, websites may be with 100s of broken links and functionality of the websites may be affected. So, it is better to go with professional service who are good at it. HostingRaja provides this migration service to our customers for FREE if you are going to migrate from another service provider to us. Click here to migrate your website by us (https://www.hostingraja.in/website-transfer/).
We provide free migration service to the following
- Shared hosting websites migration
- VPS server migration
- Dedicated server migration
- WordPress Website migration
- Domain transfer
- Python server migration
- Nodejs, express js, all other JS framework based application migration
- Windows server migration
- Email servers migration
- On-Premise Servers to Cloud-Based server migration
Transfer the websites from Plesk to cPanel
In the Hosting industry both Plesk and cPanel are used to manage the websites. cPanel is very familiar with Linux based hosting and whereas Plesk panel is mainly used for Windows hosting.
I would recommend cPanel if you want to host PHP, MySQL based websites. If you want to use asp.net, MsSQL then windows plesk panel will be the best choice.
If you want to transfer the account from Plesk to cPanel or cPanel to cPanel the Transfer Tool has been used.
Windows to Linux is not possible via this feature. Below are the steps to transfer your website from your Parallels Plesk server to cPanel server.
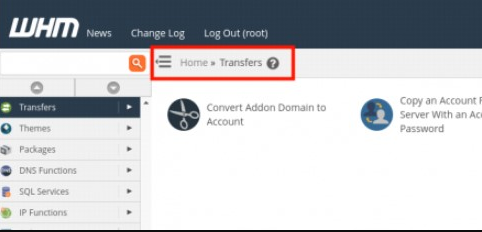
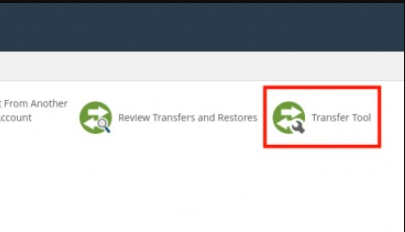
Step 1: login to WHM panel with root login and then click on “Transfer Tool”
Step 2: Enter the Remote details of the Plesk panel.
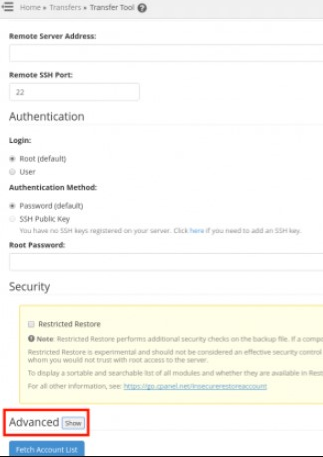
Remote Address:
Remote SSH port:
Password:
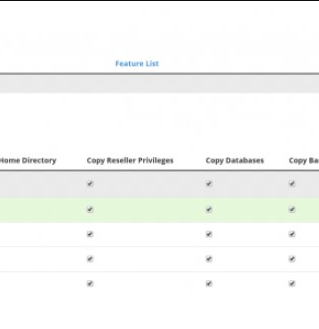
We need to add an IP address on the “Remote Address” field to fetch the account information and enter the other details like port and password and then click on Advanced option to show all the entire features as shown in the below images.
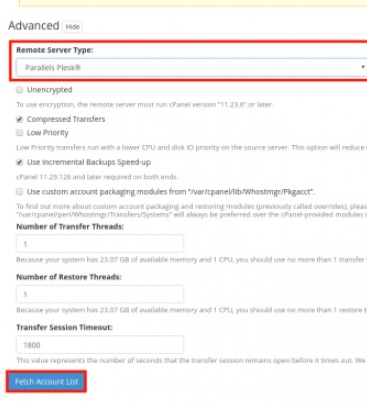
Step 3: Fill the fields on remote addresses and click on Advanced tab and choose Remote server Type as “Parallels Plesk” then check the compressed transfers and click on the “Fetch account details”
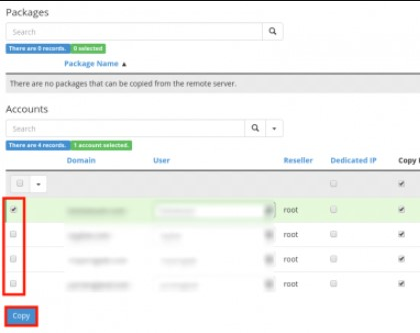
Step 4: Using this Interface you can select the accounts that you wish to Migrate to a new server, you can select the account by checking the boxes and then click on the copy button to initiate the transfer.
Once migrated you can see the Progress to 100% as migrated successfully.
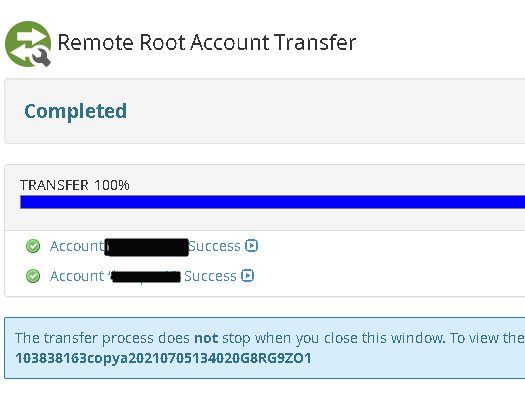
Migration done successfully.
How to migrate Cpanel account to Plesk Panel
Using the Plesk interface we can migrate cPanel accounts to the Plesk panel.
Step1 : Login to the Plesk panel with admin credentials.
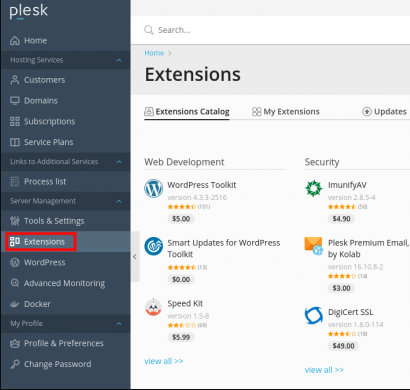
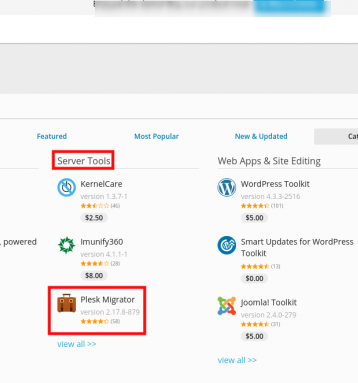
Click on the Extension ⇒ server tools ⇒ Plesk Migrator
Step 2: Once you open the Plesk migrator you can enter the details of the cpanel as mentioned in below Screen
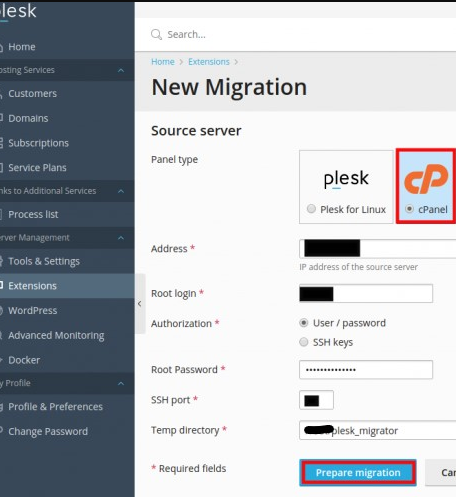
Once you click on the Prepare migration it will fetch the data from the source server ie: cpanel server.
Step 3: Now you will get the Option to select the Subscription and the domain which you want to migrate, please select the required option and click on Start Migration.
You can migrate it by selecting any of the below options, if you want to migrate it by subscription then choose subscriptions or any other option as per your requirement.
Subscription
Customer
Reseller
Hosting Plan
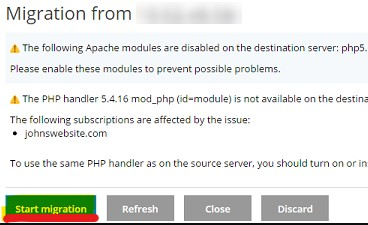
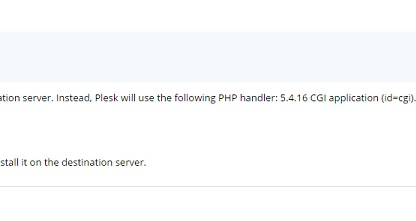
Note: Before clicking on the start button make sure the report is clean after the pre-migration checks then you can click ‘Start migration’.
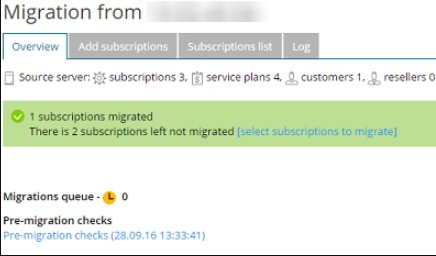
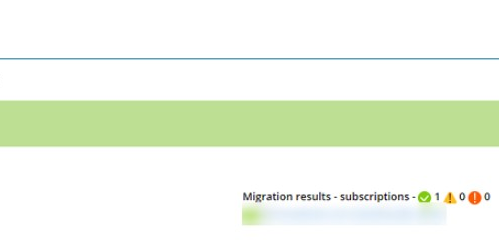
The status of the migration can be monitored on the overview tab and once migrated you will get the message as subscriptions migrated successfully.
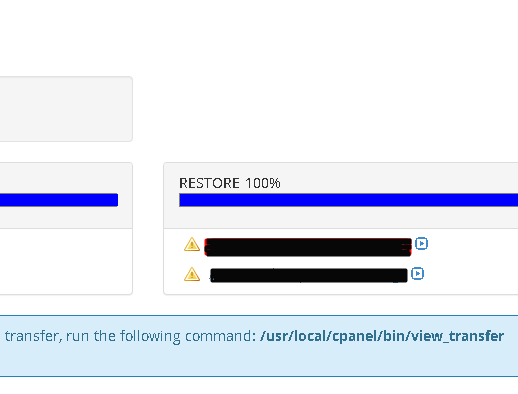
Once all the data has migrated you can click ‘Finish Migration’ If not, you can rsync it one more time.