

1. Sign in to the Google Admin Console
Sign in to the Google Admin Console using an administrator account.2. Open the Data Import & Export settings
After signing in:- Navigate to Data.
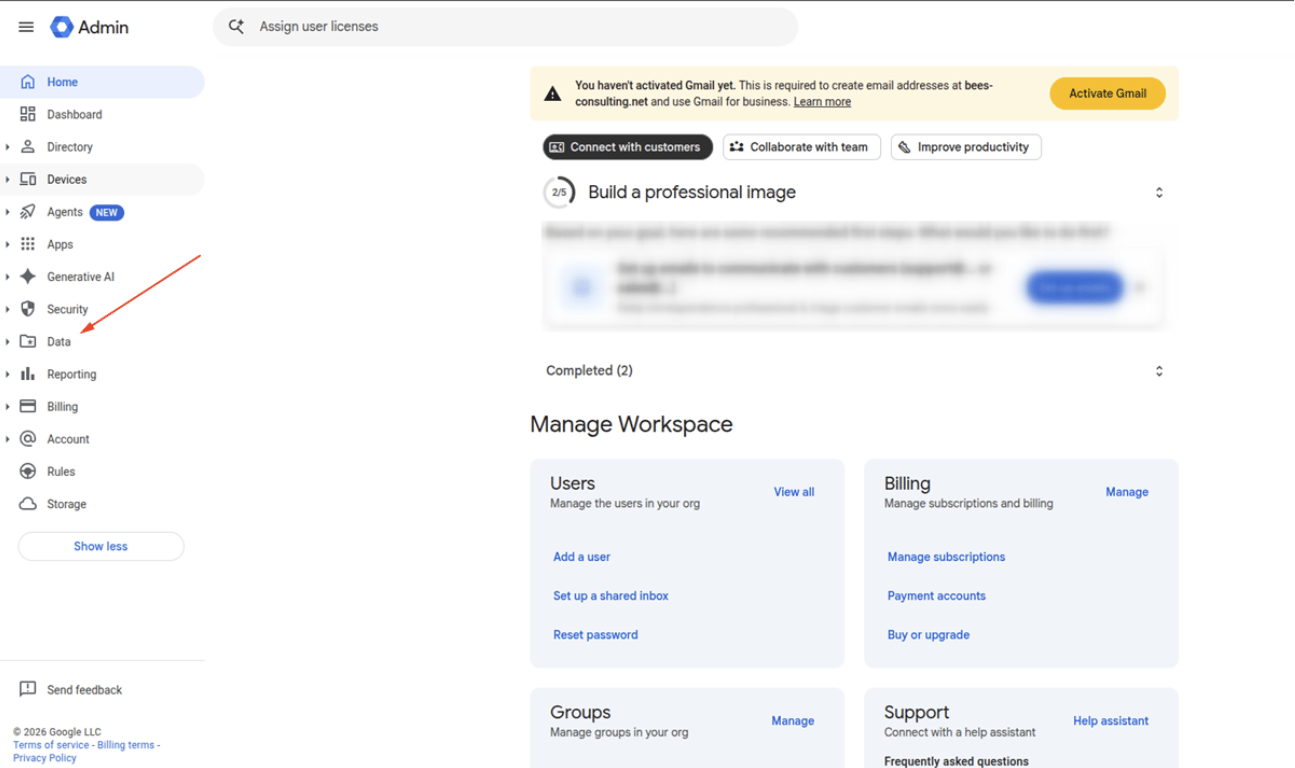
- Select Data import & export.
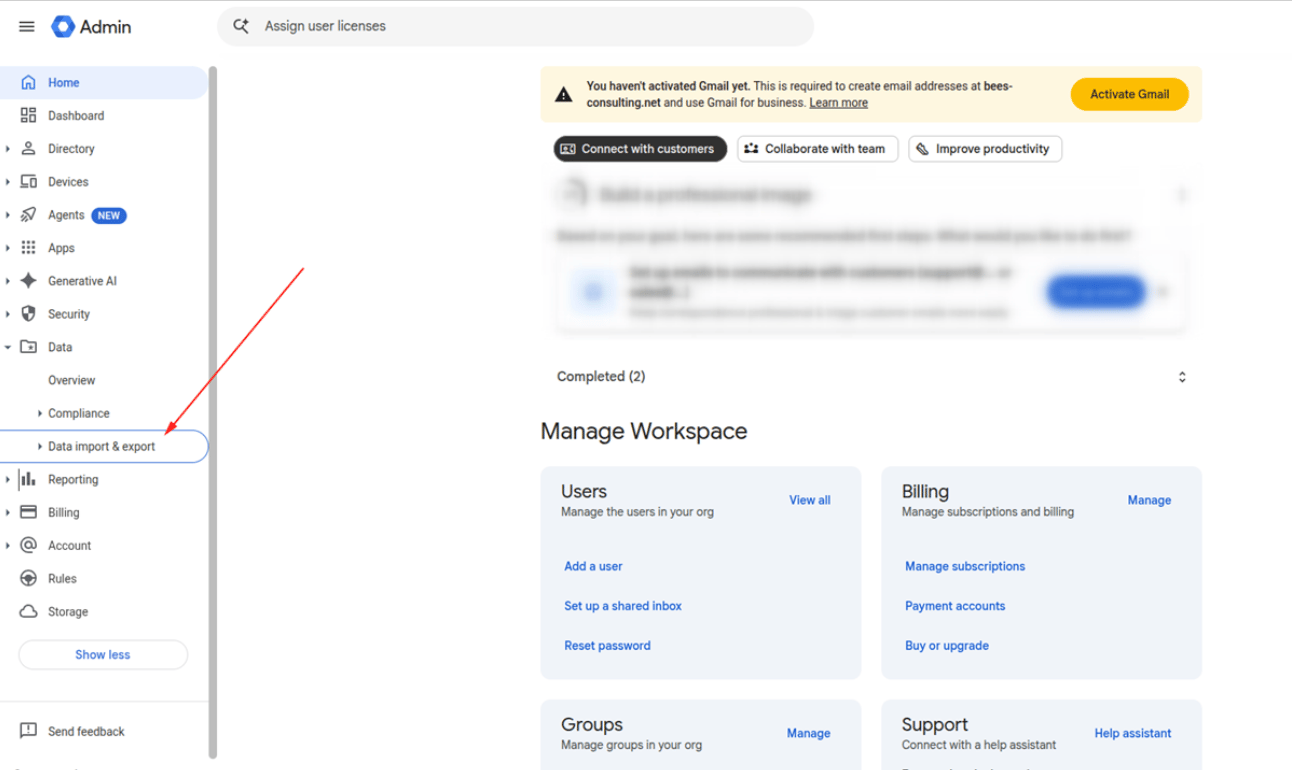
- Select the appropriate email migration or import option.
3. Select the IMAP migration option
- Select Import data from other providers.
- Click Import.
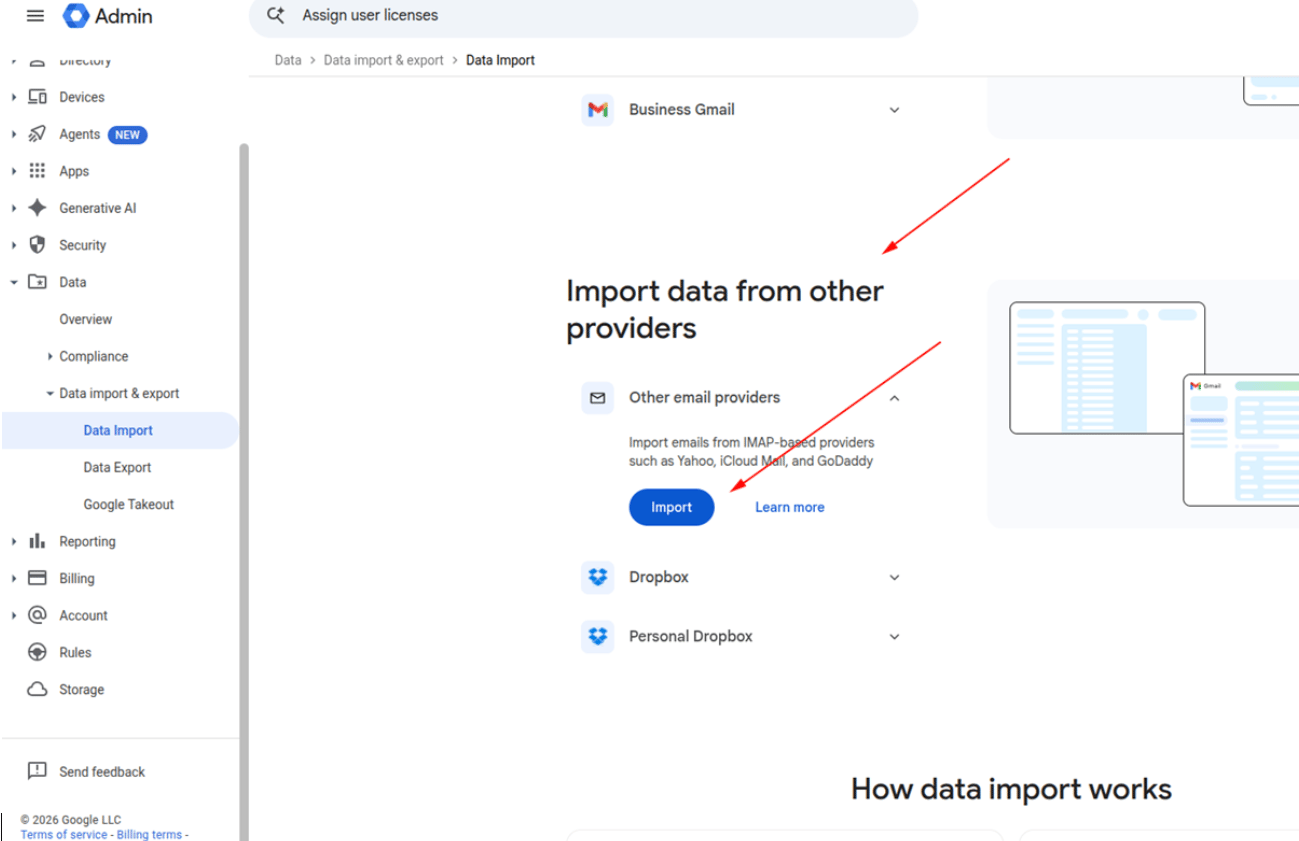
- Select the IMAP migration option.
- Configure the source mail server details.
4. Connect to the IMAP server
On the Import data from IMAP page, configure the connection to the source mail server.Enter the IMAP server address
In the IMAP server address field, enter the IMAP hostname of the source mail server. Example:Note: Use the IMAP hostname provided by the source mail server or hosting provider. If supported by the source configuration, the server IP address may also be used.
Test the connection
Click Test connection to verify the connection details.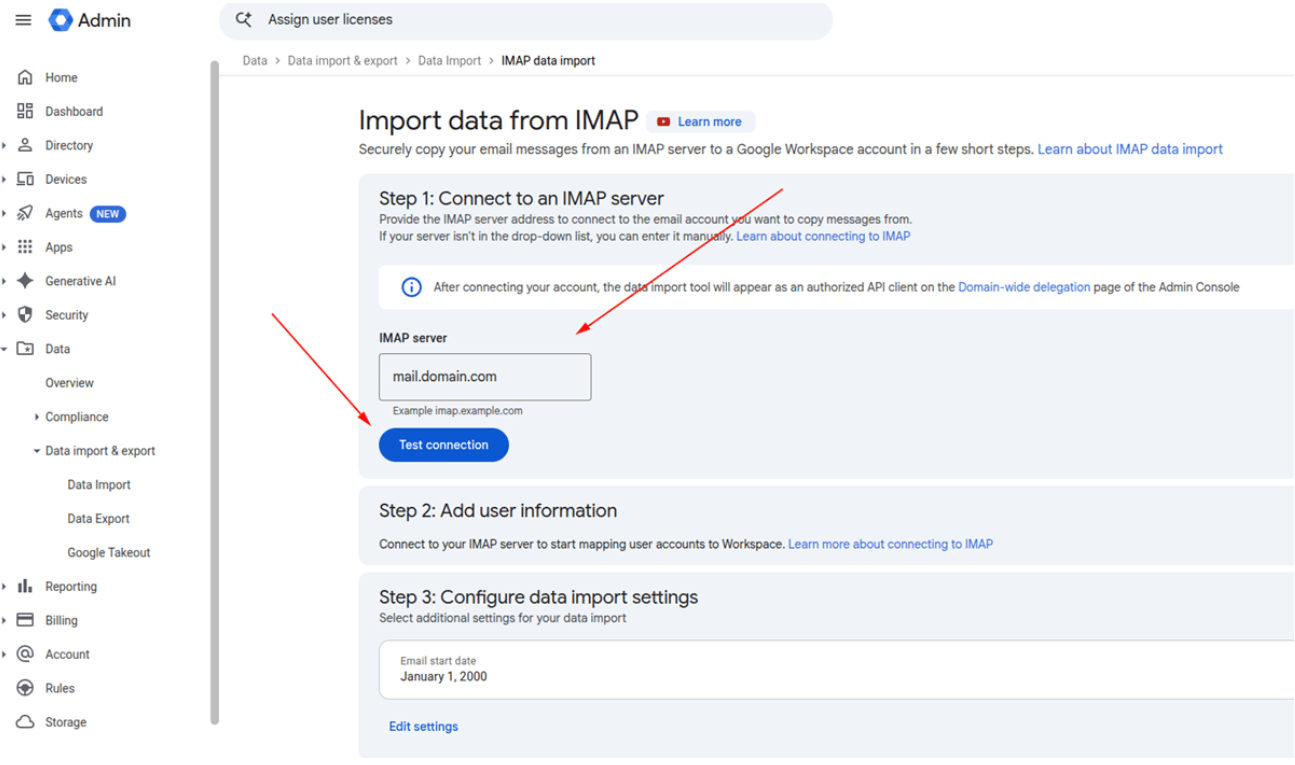
- If the connection is successful, proceed to Add User Information.
- If the connection fails, verify the IMAP server address and source mail server configuration before continuing.
5. Add user information
After the IMAP connection is successfully established, proceed to Add user information.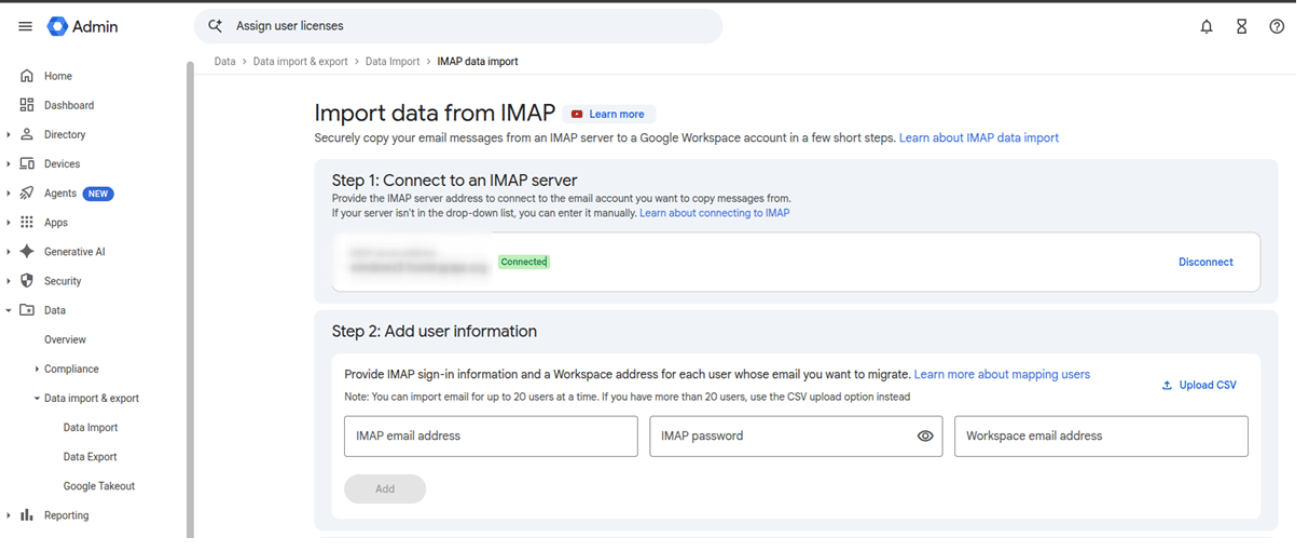
Example
You will generally need the following information for each mailbox:
- Source email address or username
- Source mailbox password
- Destination Google Workspace email address
Example mailbox details
Source Email:[email protected] Source Password: Destination:
[email protected]
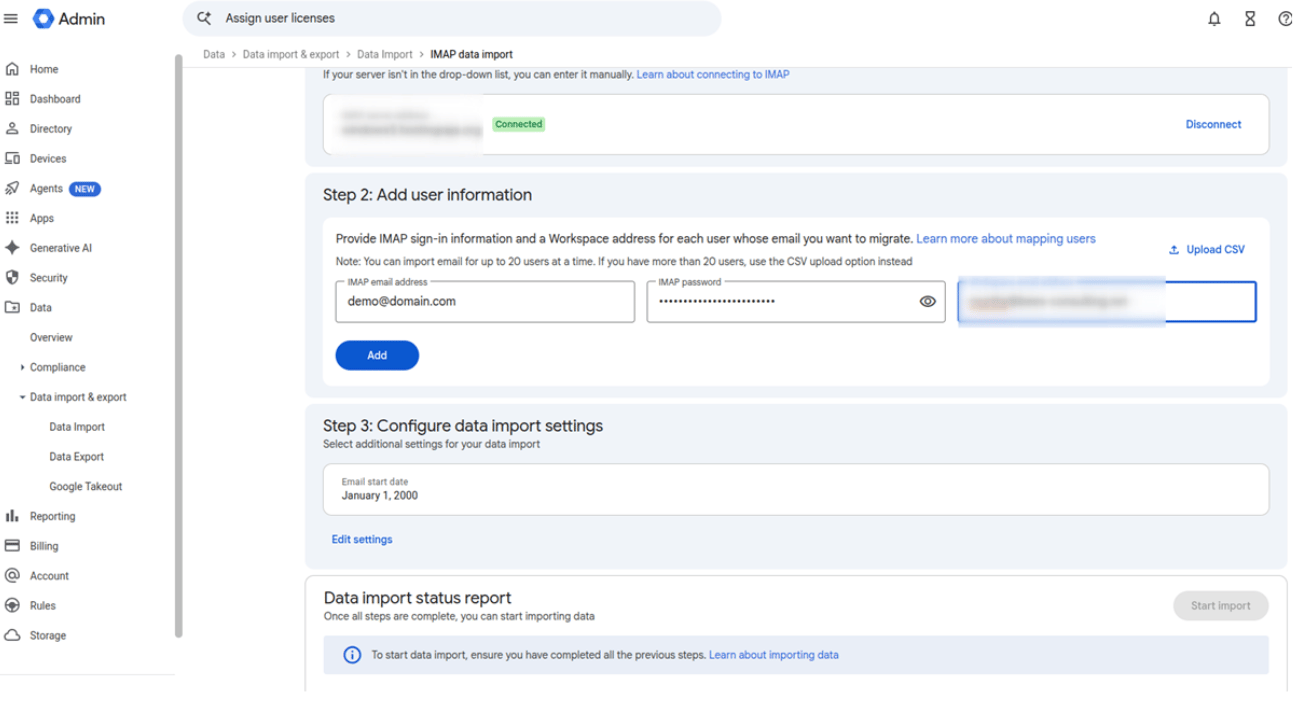
6. Configure data import settings
Configure the data import settings according to the migration requirements.Select the email start date
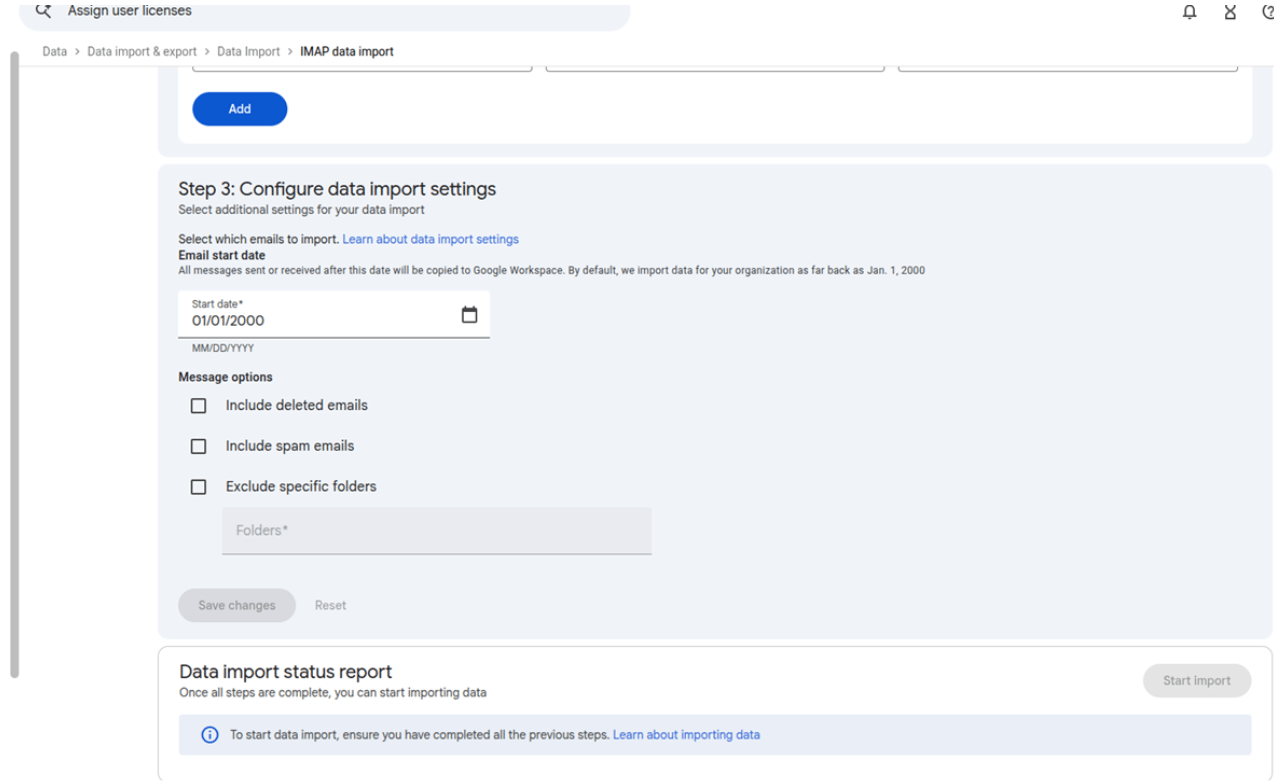
Select the required email start date. To migrate all available historical emails, select a date sufficiently far in the past. Click Edit settings to review the available migration options.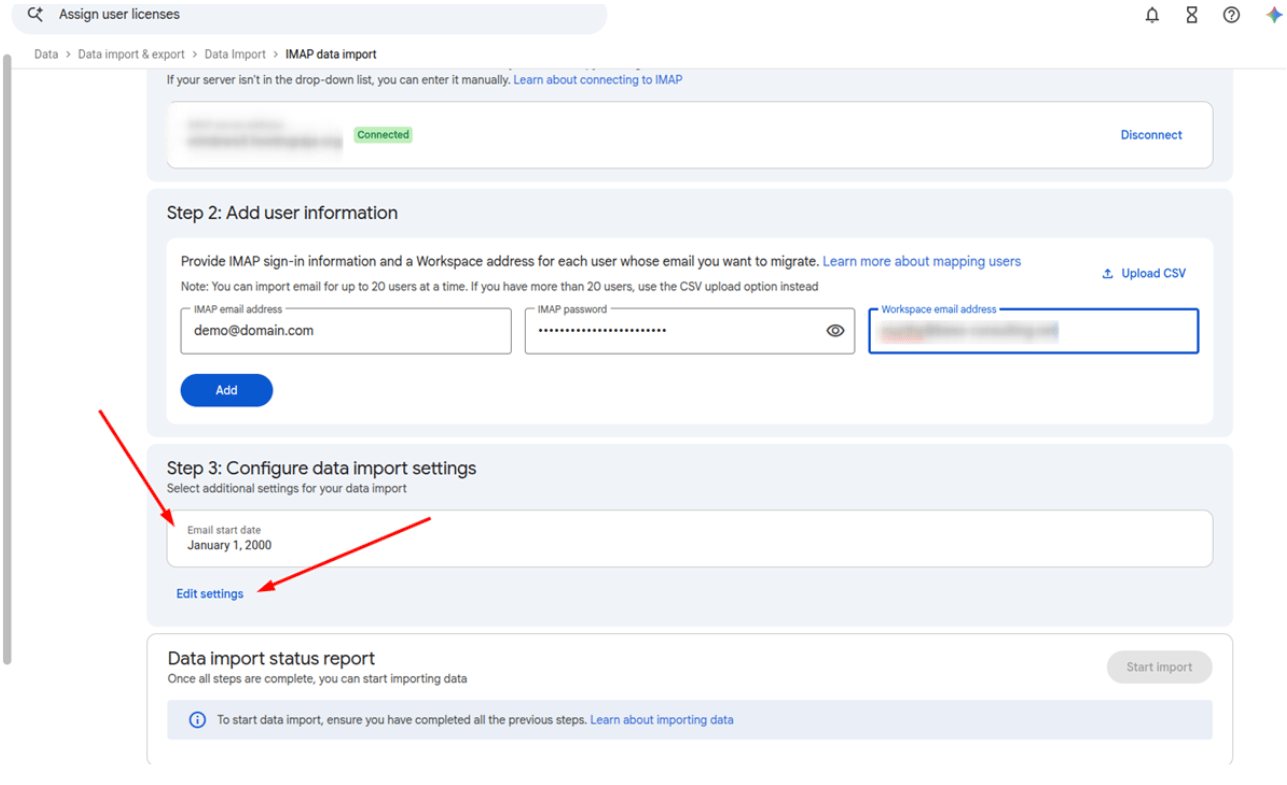
- Email start date
- Email folders to migrate
- Spam/Junk mail
- Deleted/Trash messages
- Other available import options
7. Start the migration
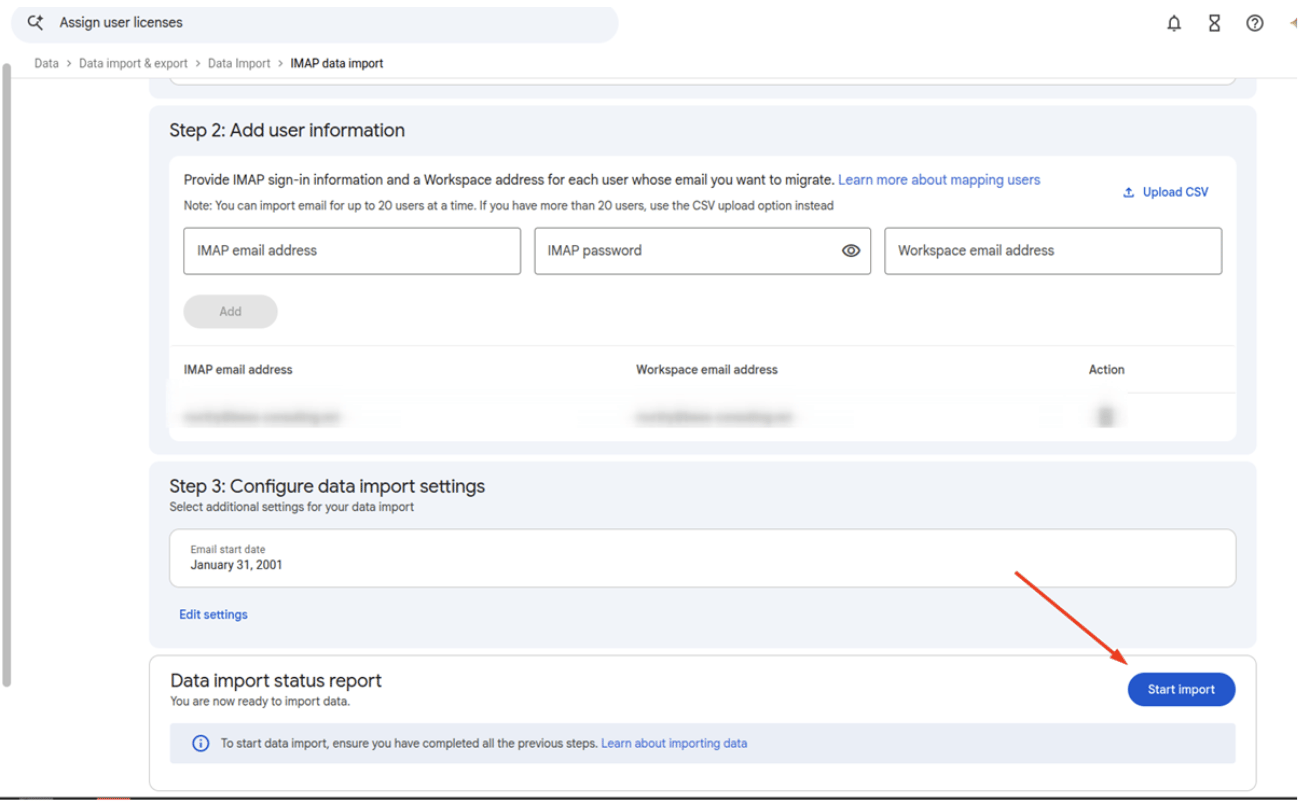
Once all required users have been added and the migration settings have been verified:- Review the source and destination email addresses.
- Verify the migration date.
- Verify the folders and settings selected for import.
- Click Start import.
8. Monitor the migration status
Use the Data import status report shown at the bottom of the page to monitor the migration. Check for:- Migration started
- In progress
- Completed
- Failed
- Number of messages migrated
- Migration errors