

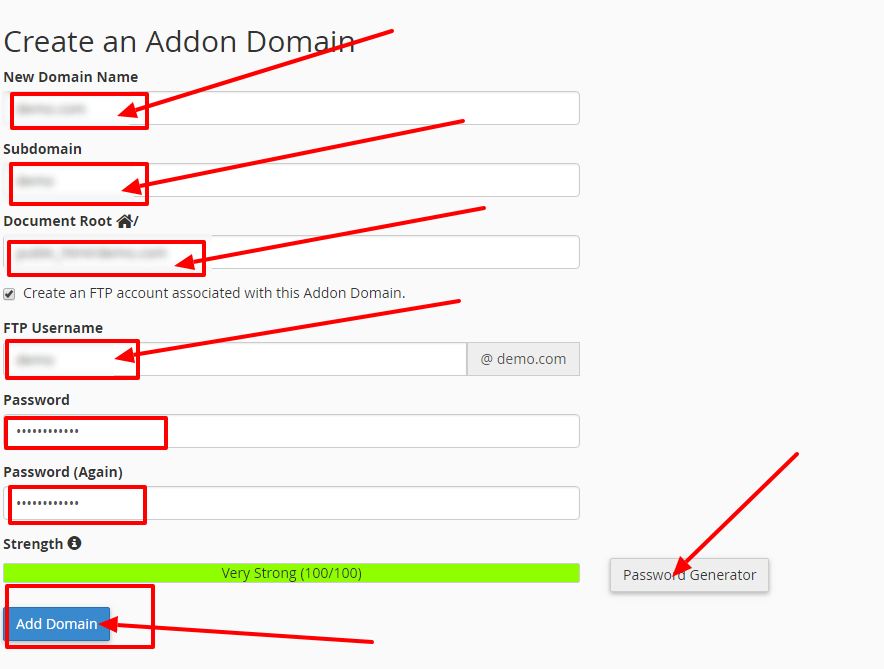
 Step 3: On the Create an Addon Domain page, Enter the details :
New domain name >> Enter the domain name of your add-on domain (After you enter the domain the Cpanel automatically fill the Subdomains and Document Root text boxes).
Subdomain >> Enter a username for the domain, you can either use the default username which the cpanel fill or you can manually enter the unique username for the subdomain.
Document Root >> Enter the directory you would like this addon domain to point to (you can either use the default root which your cpanel fills or manual enter the document root).
And if require a FTP account to be created for addon domain then select Create an FTP account associated with this Addon Domain check box.
After you select the checkbox Enter the FTP username for your addon domain or you can also go by the username which cpanel fills automatically. And enter the FTP password make sure you use a by the strong password for your FTP account.
After you enter the appropriate details Click on Add Domain.
Step 3: On the Create an Addon Domain page, Enter the details :
New domain name >> Enter the domain name of your add-on domain (After you enter the domain the Cpanel automatically fill the Subdomains and Document Root text boxes).
Subdomain >> Enter a username for the domain, you can either use the default username which the cpanel fill or you can manually enter the unique username for the subdomain.
Document Root >> Enter the directory you would like this addon domain to point to (you can either use the default root which your cpanel fills or manual enter the document root).
And if require a FTP account to be created for addon domain then select Create an FTP account associated with this Addon Domain check box.
After you select the checkbox Enter the FTP username for your addon domain or you can also go by the username which cpanel fills automatically. And enter the FTP password make sure you use a by the strong password for your FTP account.
After you enter the appropriate details Click on Add Domain.
 Note :
The password is evaluated in the scale of 100 points, A strong password would have a scale of 100 while a weak password would have 0 points and the green color is used to denote a strong password.
You can always use a password generator for generating the password.
You cannot have the same subdomain name for multiple domains.
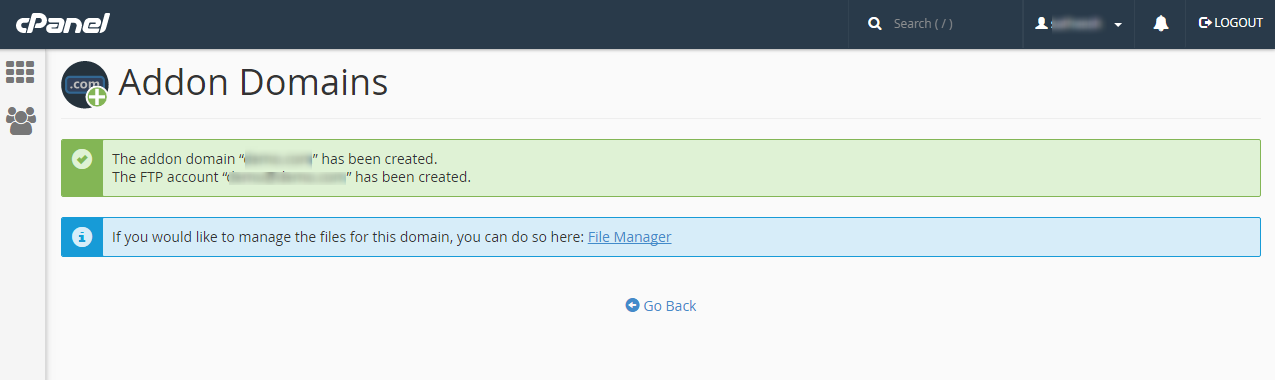
Step 4: After you click on add domain >> your Add Domain will be created you will get a prompt as shown belowThe ‘/’ directory represents home directory of your c-panel. You cannot use the following directories as a document root while adding add-on : home directory ( / ), Directories outside of home directory ( ./ and ../ ), .cpanel, .trash, etc, mail, ssl, tmp, logs, .cphorde, .spamassassin, .htpasswds, var, cgi-bin, .ssh, perl5
 Some of the frequently asked questions about addon domains
1) What is the directory to upload the files for addon domain?
Some of the frequently asked questions about addon domains
1) What is the directory to upload the files for addon domain?While creating addon domain, what document root you have given based on that you need to upload the files in that document root path. Example: For example if you have created “example.com” as an addon domain If you are created the addon domain inside the public_html, then you need to upload the file in the below mentioned path inside the file manager. Path: home/public_html/example.com If you are created the addon domain in home directory then, then you need to upload the file in below mentioned path inside the file-manager. Path: home/example.com 2) What nameservers or A record need to be updated for addon domain?
Nameservers or “A” record will differ based on the server where your account is hosted. If you are purchased the account from hostingraja, when you have purchased hosting account at that time we have sent the “Hosting New Account Information” email. In that email we have mentioned the nameservers and “A” record for your hosting account. To make your domain live you need to update the “nameservers” or “A” record for the domain in the domain control panel, where you have purchased. 3) How to create email account for addon domain.
Follow the below steps for creating email account for addon domain.
- In cpanel click on the “Email Accounts” under “Email” section.
- Click on “Add email account”
- Under “Domain” select your addon domain.
- Type your username and type the strong password.
- Click on “Create Account”
Follow the below steps for creating Ftp account for addon domain.
- In cpanel click on the “Ftp Account” under “Files” section in cpanel.
- In “Domain” select box, select the addon domain name.
- Enter the username and password for ftp account.
- Set the addon domain ftp account directory same as the document root of the addon domain.
- Click on create “FTP account”.
- Click on the “Softaculous Apps Installer” under “Software” section.
- Select the “CMS” which you need to install.
- Select the select the addon domain and install the “CMS” software.
- Click on the “Weebly” under “Files section”.
- Select your addon domain and click on “Add” button.
- Once you click on “ADD” button it will ask you to enter the FTP credentials created under cpanel.
- Once you enter the FTP credentials click on “Validate your FTP”.
- After validation click on the submit button.